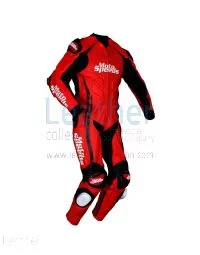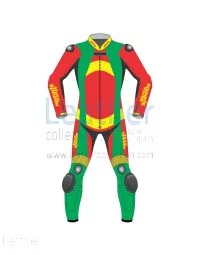
 USA
USA  Canada
  Brazil
  Germany
  France
  Italy
Italy  Switzerland
  Sweden
  Spain
Spain  Great Britain
  Norway
  Russia
  Japan
Japan  New Zealand
  Australia
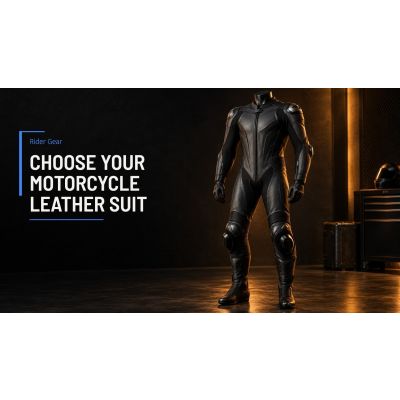
To choose a motorcycle leather suit, start with how and where you ride, then check four things in order: the suit format (one-piece or two-piece), the fit in the riding position, the armour and its placement, and the stated protection standard. Looks and colours come last. A suit that fits correctly and is built for your kind of riding will do more for you than one that merely looks the part.
Key Takeaways
- One-piece and two-piece suits differ in the waist join, ease of dressing and sizing; choose by how you will ride and wear it.
- Fit decides whether armour stays where it should; test it in the riding position, not standing.
- EN 17092 has five classes (AAA, AA, A, B, C); ask for documentation instead of assuming a level.
- Armour levels are separate from the garment class, so check the armour option and ask for the paperwork.
Start With How You Ride
A suit is a tool for a particular job. Riders who spend weekends at track days need different things from riders who want a suit for fast road rides or occasional events. Before comparing designs, write down where the suit will actually be worn, how long each ride lasts, and whether you need to walk around in it between sessions.
Riders planning track days can look at the full range of and compare the cut for a tucked riding position. Riders who also want to use the gear off the bike more often may want to compare formats first.
One-Piece or Two-Piece
A one-piece suit is a single garment with no waist join. A two-piece suit separates into a jacket and trousers, usually joined by a zip around the waist. It is easier to get in and out of, simpler to size if your top and bottom halves differ, and more practical when you need to take half of it off.
The trade-off is the join itself: look at how long the connecting zip is and how well it lies flat when you lean forward. Riders sizing for different upper and lower proportions can browse the range, while the range lists the one-piece styles.
| Consideration | One-piece | Two-piece |
|---|---|---|
| Waist join | None | Connecting zip |
| Putting it on | Takes more effort | Easier, in two parts |
| Sizing | One size must suit the whole body | Top and bottom can differ |
| Off-bike use | Limited | Jacket and trousers can be worn separately |
Getting the Fit Right
Fit is the single most useful thing to check, because armour and abrasion-resistant leather only help when they stay in place. A suit should feel snug on first wear. Some leathers relax with use, so a slightly firm feel can be normal, but a suit should never cause pain or numbness; ask the maker about the leather used.
Measure before you order
Take the chest, waist, hips, inseam, arm length and height measurements listed in the maker's size chart, using a soft tape and light clothing. Measure twice. If you fall between sizes, ask whether the maker can adjust the pattern. Men's and women's patterns differ in the chest, waist and hip proportions, so compare the and ranges rather than guessing a size across them.
Check the riding position
Standing straight is the wrong test. Sit on a bike or crouch into a tucked position and check that:
- the sleeves do not pull back past your wrists when your arms reach forward
- the knees and elbows stay over the armour pockets
- the back does not tension across the shoulders
- the collar does not press on your neck when you look ahead
Armour and Protection Standards
Two different things are easy to mix up here: the garment and the armour inside it. EN 17092 is the standard for the garment. According to SATRA, it has five classes, AAA, AA, A, B and C, where Class AAA offers the highest level of protection and Class A the lowest of the three main classes, while B and C are special classes (B: garments without impact protectors; C: under/over garments). Leather specimens in the Darmstadt abrasion test are checked for holes in the layer closest to the body.
Armour is covered by separate standards. For limb protectors such as knees and elbows, EN 1621-1 defines two levels: according to Wikipedia, Level 1 means the average transmitted force is below 35 kN with no single value over 50 kN, and Level 2 means an average below 20 kN, as published in EN 1621-1:2012 and summarised there. Back protectors have their own standard, EN 1621-2, and Level 2 allows lower transmitted force than Level 1.
What this means in practice: never assume a suit carries a given class or armour level from its appearance. Check the product page and order form for the armour option, and ask the maker for the documentation that covers the garment and the armour you choose.
Construction Details to Check
Once format, fit and protection are settled, compare construction. Useful points to look at include:
- Seams: look at stitching along the shoulders, underarms and crotch, where a suit is stressed most.
- Stretch panels: they help with movement behind the knees and across the back, but their position and size vary by design.
- Lining: affects comfort over a long session, particularly in warm weather.
- Zips and closures: check that cuffs and ankle zips are easy to operate with gloves on.
- Hump or aero tail: a matter of riding style; it is not required for every rider.
A suit works with the rest of your gear, so confirm that it works with your boots, gloves and a back protector. Two examples of suits to compare are the and the ; the order form for the Tyro lists a 1 Piece or 2 Piece choice, speed hump and perforation options and a CE Level 2 (EN 1621-1:2012) add-on, and the Bravo page lists the same kinds of options. Compare cut, panels and options on each page against your own checklist.
Try before you commit
If a local fitting is not possible, compare the maker's size chart against a suit you already own and ask about adjustments to sleeve, inseam or torso length. Photograph yourself in a tuck wearing the closest-fitting garment you have: the images show where fabric pulls and where gaps would appear.
Common Mistakes When Choosing a Suit
- Buying for appearance alone. Graphics and colours are fun, but they do not change fit or protection.
- Sizing for standing comfort. A suit that feels roomy standing up may bunch badly in a tuck.
- Ignoring the armour option. Armour is often chosen separately from the garment, so confirm the choice before you order.
- Assuming a standard class from a look. Ask for documentation instead.
- Forgetting the care label. Follow the garment's care label and the maker's instructions; the right care depends on the leather's finish and construction.
Riders still deciding between categories can use the category as a wider overview, then narrow down by format and fit.
Frequently Asked Questions
What is the difference between a one-piece and a two-piece leather suit?
A one-piece suit is a single garment with no gap at the waist. A two-piece pairs a jacket and trousers joined by a zip, which makes it easier to put on, wear off the bike and mix sizes. Fit and the connecting zip matter more than the format alone.
How tight should a motorcycle leather suit feel?
A new suit should feel snug without restricting movement. Standing, it should hold your shoulders, elbows and knees without gaps; in the riding position it should not pull across the back or bunch behind the knees. Some leathers relax with wear, so a slightly firm fit can be normal, but pain or numbness is not.
What does EN 17092 mean on a suit?
EN 17092 is the European standard for motorcycle protective clothing. It sorts garments into five classes: AAA, AA, A, B and C. According to SATRA, Class AAA offers the highest level of protection and Class A the lowest of the three main classes, while B and C are special classes. Ask the maker for documentation of any class claimed.
Can I wear a leather suit every day?
Leather suits are made for riding, so comfort off the bike varies by cut, lining and climate. A two-piece with a connecting zip can be split into a jacket and trousers for daily use, while a one-piece is usually reserved for rides where you stay in the riding position. Check the sizing guide and ventilation options first.
Should armour be adjustable or fixed?
Armour works only where it sits over the joint or bone it covers. Removable armour in pockets can be shifted and swapped, which helps if your height or build sits between sizes, while fixed armour depends entirely on the cut. Whichever the design, check the position of knees, elbows and shoulders when you try the suit on.
Written by the Leather Collection Editorial Team.